How to contribute to open-source project: A beginner's guide
Open SourceAre you a first-time contributor? Are you wondering how to start contributing to OSS? Well, this guide is made for you. Hopefully, you are reading this because you are looking to take the first step toward making an open-source contribution! You’ve been using multiple Open-Source projects and have read many articles, including this introduction to Open-Source Software. You’ve been sold on the idea and can’t wait to start! Only, how do you even begin? How do you decide on the right project? What happens if something goes wrong? This can be a bit intimidating at first. No need to worry though.
There is a myriad of ways to start contributing. Let’s dive right in then.
Step 0: Preparation
First, let’s get this one thing clear: You don’t need to know coding to contribute to OSS Project. You can work on documentation projects or contribute using your design, communication, and guiding abilities! Here is a list of such Open-Source projects link
If you do want to contribute to the source project, we’d suggest you pick a language that suits you best. JavaScript, Python, Java, Ruby, and PHP are the most frequently used programming languages on GitHub. Another important concept you need to learn, regardless of whether you are a programmer or not, is version control. Version Control Systems (VCS) helps you track and manage changes in your software project. They enable multiple teams to work on different parts of the project simultaneously and make it convenient to revert to earlier versions if someone makes a mistake. The most popular VCS right now is Git and there’s an awesome YouTube playlist by Corey Schafer on Git and Version control that we highly recommend.
Step 1: Project Identification Start small and steady!

Once you have the basics clear, it’s time to identify the type of project that suits you. Go for something familiar and smaller that interests you - like a library you use every day, a framework you are familiar with, or an app you’ve been using regularly. It will help you grasp the fundamentals of collaborative environments. This step is crucial. Most first-time open-source contributors that choose a complex project end up getting discouraged when they can’t contribute to it. Hence, we suggest picking a project that is either small or extremely well-documented. If you still can’t find a suitable project, GitHub has you covered. GitHub projects are clustered into directories called ‘Showcases’ such as “security”, “virtual reality”, “text editors”, “CSS preprocessors”, etc. You can choose the showcase you like and browse a multitude of projects there.GitHub also has a curated list of first contributions, and you may begin by making your initial attempts using these lists here (https://github.com/firstcontributions/first-contributions).
Step 2: Identify an issue within the project

GitHub issues is a place to report bugs in a project but it’s also much more than that. Developers use them to collect user feedback, request new features, request to remove recently added features, and much more. You’ll find issue labels like “Beginner-friendly", “Low-hanging Fruit”, “Good First Issue”, “Help Wanted”, etc., that denote the issues that may better be addressed. A good way would be to comment on an issue that you’d like to help with, before undertaking any significant coding work. Tap on the tab to view the issues. Contributing to the documentation of the issue selected is always a good way to start! This is what the issue tab of a usual project looks like. Notice the ”Good First Issue” here.
Before finalizing an issue, go through the comments and make sure it is a legit issue that has been verified by one of the maintainers. However, don’t feel discouraged if you’re not able to find a suitable issue. You can always go back, and select another project and I’m sure you can find an issue that you can resolve. You can also find some beginner-friendly issues here:
- Up For Grabs
- 24 Pull Requests
- Hacktoberfest
- First Timers Only
- Your First PR
- CodeTriage
- Open Source Friday
Step 3: Setting Up the Environment
Most well-documented projects have a guide dedicated to contributing to their project which you can find either on their Readme or with a quick Google search. Follow these three steps while setting up the environment.
- Fork the repo: Make your own copy of the project and resolve the issues in your copy. Later you’ll merge your copy into their project.
- Clone the repo: Download the project on your local machine for contributing.
- (Optional) Initial Setup: Some projects require you to do some initial setup before you make any changes. This could range from making a virtual environment for creating a Docker container. If your project requires you to do so, then it would most likely be mentioned in their README and/or CONTRIBUTING files.
Great! You’re finally done with the setup and are ready to get your hands dirty with the code.
Step 4: Issue decided - now what?
So, you’ve found a suitable issue to make your first contribution. It’s common etiquette to get the issue assigned to yourself so that multiple people don’t work on the same issue simultaneously. You can comment on the issue and wait for one of the maintainers to assign it to you. Once done, you can start working on it.
Verify your local environment by reproducing the issue. This also helps test the changes you’ll have made in the repository.
If you feel stuck or have ideas that you’re not completely sure about, ask in the comments section of that issue. At this point, it should be kept in mind to not unnecessarily tag maintainers when commenting. This is usually considered spamming unless absolutely required. If you need a more detailed and thorough explanation of the hurdles you’re facing, you can also go to their communication channels and ask questions to get suggestions from the whole community. The communication platform varies depending on the project. It can be found generally in the README.md or CONTRIBUTING.md files in the repository.
Step 5: Send pull requests to notify and merge the code.
Once your changes have been tested and verified, commit these to your local repository. Make sure you follow the commit message conventions and practices followed by the organization and/or the repository to you’re contributing to. Push your changes to your forked repository.
Now for the big moment, create a Pull Request (PR) to the upstream repository with a simple button click from your repository. Describe your changes in brief. Remember to link the issue with the PR description by adding the issue number to it. Wait for the PR to get updated.
Usually, when a PR is created, the CI/CD pipeline attached to the repository will run its tests. Wait for it to run successfully. The maintainers will review your changes as well. It may happen that you’ve not gotten any response on the submitted PR for some time. If it has been more than a week, it is perfectly okay to give them a gentle nudge on the thread to ask for reviews. It is perfectly normal to get asked to make changes to your code; make sure to take them up and commit them once done. Reiterate the process as many times as it takes to get approval. Sometimes, the discussion may have gone on for too long and your conditions may have changed, in such cases, let the maintainer know of your situation so that it can be assigned to someone else.
Sometimes, it may happen that your contribution doesn’t get accepted. You can ask the project maintainer to give you feedback. There is no need to feel down. Even seasoned contributors get their PRs rejected many times. With the same amount of enthusiasm, pick up a different issue or even a different project and start working again. You may even fork the git repository to work with your own version.
If all goes well, wait for the email thread to say
-
“Your PR has been approved.”
-
“Your PR has been accepted.”
Congratulations on your first PR!
What’s Next?
Skip to a couple of months ahead of your first OSS contribution, you’re now an experienced contributor. You don’t look for “Beginner Issues” anymore and you even find bugs and solve them yourselves. You’ve come a long way from where you began and now, you’re wondering what’s next.
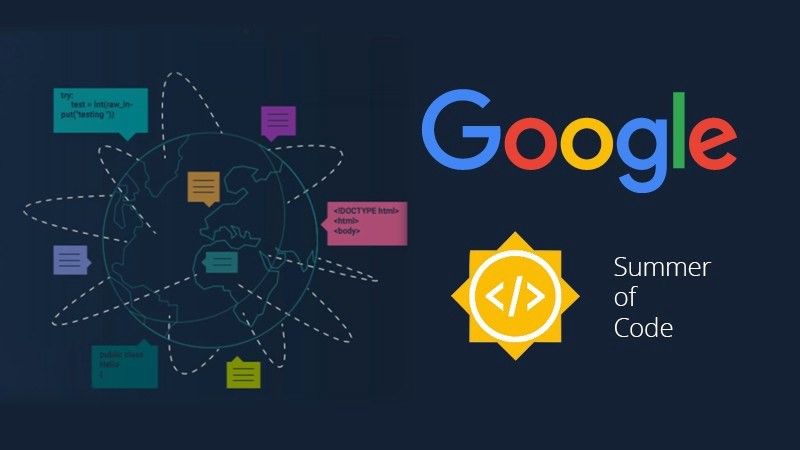
- For student developers, there are many programs to encourage OSS contributions. One such is Google Summer of Code where students work on a 10-week programming project, giving them experience in real-world software development with an Open-Source organization.
- Outreachy is yet another program with a unique aim to provide internships to work on Open-Source projects for a diverse community of people subjected to structural bias in the tech industry.
Do you have a project that other people can also benefit from? Do you still feel that your project has room for growth? You don’t have to do it alone. Make your project Open Source! Add an Open-Source license to it, automate tests and builds with CI/CD pipelines. Add your README to explain why your project is useful, what wonders it does and how people can use it. Create CONTRIBUTION guidelines with respect to the standards you want to be followed in your repository. Connect with a wider community of users and contributors while building something you love.